

If you read this blog regularly [or even just read the about me section], then you know I am by no means a crafty person at all. However, I did complete a couple projects over the weekend and showed final results on Monday, and have since received requests on how-tos for them. I didn't take step by step pictures of either one, but they were quite simple and should be extremely easy to replicate even without photos.
Book Page Cabinet
BEFORE

Materials:
Cabinet [or table, or nightstand, etc.]
Used book
Modge Podge, or similar product
Sponge brush
[sandpaper, waterproof coating]
Step One. Find a used book that you won't mind tearing apart. Hard back copies are the easiest to remove pages from without tearing them. I chose Ivanhoe to cover my cabinet in.
Step Two. Thoroughly clean cabinet and glass.
Step Three, optional. Sand down all portions of cabinet you will be covering. This will help the glue base stick better. Since this was just an experiment for me, I didn't do this step, and it still worked out well.
Step Four. Coat book page on the side that will be facing down in Modge Podge using a foam brush. Also coat small area of cabinet in same base, and place book page in desired location. Top with another coat of Modge Podge.
Step Five. Continue until all areas are complete! Allow to dry for a day or two.
Step Six, optional. Use a water proof coating to seal all surfaces. Because mine is used as a side table with coasters, and because I don't know how to find this kind of product in Germany, I didn't do this step.
It's not perfect, and will possibly need to be redone in the future, but I'm happy with my first attempt at redoing a piece of furniture.
AFTER

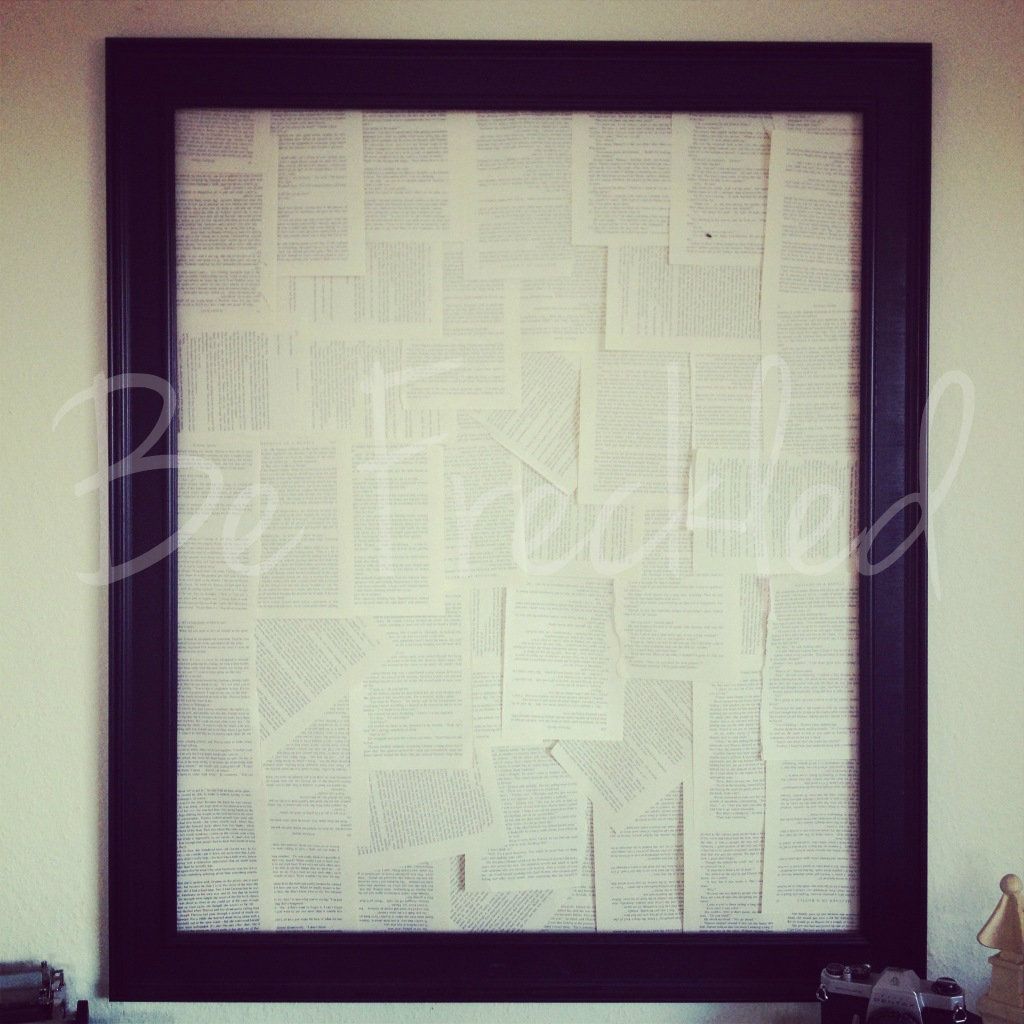
Book Page Frame
Materials:
Empty picture frame [any size] with/without backing
Used book
Tape
I have tons of empty frames around the house, and just reused one that was already hanging. This project could easily be done with smaller or larger frames as well.
Step One. Find a used book you don't mind tearing apart. Again, hard back copies are the easiest to remove pages from without the paper ripping. For this, I used a random Nicholas Sparks novel.
Step Two. With the back of the frame facing you, begin by taping book pages to the top of the frame. Continue taping pages to each other and to the frame until all spaces are covered and no holes show.
Step Three. Hang the frame! Because mine did not have a backing on it, and was simply hung by using the frame itself, I simply broke a hole through the pages at the top with the nail head. The tear is minuscule and can't be seen unless you know it's there.
Alternative: Using the backing that came with the frame, or cardboard/poster board/foam board, glue or tape book pages until it is covered, then reattach to the frame. This will allow the pages to seem more seamless and flat.
I didn't tape down every single corner of the pages so that it added texture to the whole look. Because mine are simply taped together and not taped down flat to a surface, it does look "bubbly" or 3D.

Hope these help for those of you that were interested! Sorry there aren't better instructions or pictures to accompany it, I honestly didn't think so many people would be intrigued by how to do them!
Ha, I knew you would turn into a craft blogger one day ;-) Really cool projects!! And your dog looks very confused that mommy crafts now! xo Anja
ReplyDeleteThis looks amazing! Well done, English! Now to see what I can cover in book bits...
ReplyDelete♥
Talia Christine
http://taliachristine.blogspot.com
Ivanhoe, what a brilliant choice! Thank you so much for sharing these. I am So excited to see how I can fit something like this into our home in the future! :)
ReplyDeleteThese look really cool. How funky is your house? I have yet to do anything with the craft material purchased making me the world's laziest craft blogger. Hope you have viel spass with your friend visiting.
ReplyDeleteRosie xx
I think I'm going to try this for our new house! :)
ReplyDeleteThat cabinet is awesome! I love it! :)
ReplyDelete